Candle Making for Beginners at Home, Safe and Simple
Candle Making at Home
Candle making for christmas at home is a 20-minute pouring session in which a beginner melts soy wax, sets a wick, and pours the liquid into a 10 oz glass jar to fill with 8 oz of finished wax.
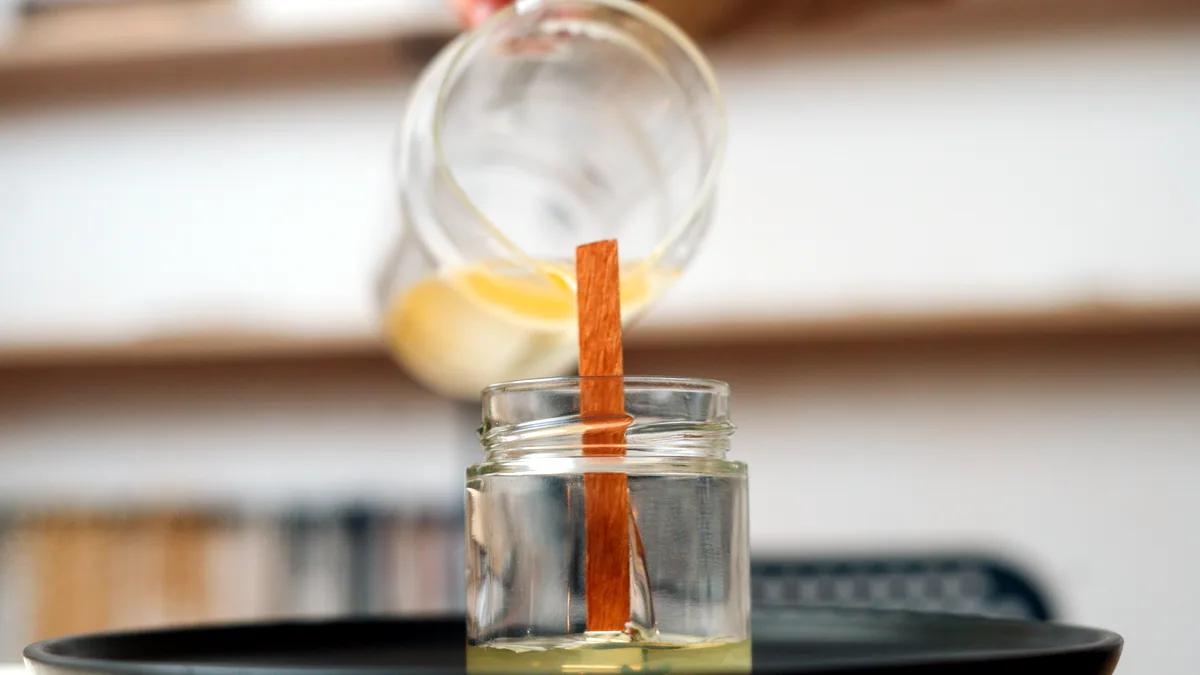
The craft asks for 7 core materials, 2 safety checks, and a steady hand, and it produces a candle that burns for roughly 40 hours. Because the work is seated, low-cost, and repeatable, it is a staple of Art & Craft Projects for Older Adults, and the same method works for everyday gifts and for a December table.
What a beginner candle kit contains
A starter kit holds every material a first pour needs, so you can learn candle making at home without shopping for parts. The 7 core items are:
- 1 lb (454 g) of soy wax, the base that carries fragrance and burns at about 135 F
- a pre-tabbed CD-8 wick, sized for a 3 in (7.6 cm) jar
- 1 wick sticker, the 1 in circle that glues the tab to the glass floor
- 10 oz (295 ml) clear glass jars with lids, 2 to 4 of them per pour
- a double boiler or a 1 qt pouring pitcher set in a saucepan of 1 in of water
- a digital kitchen thermometer that reads to within 1 F
- fragrance oil, dosed at 1 oz per 1 lb (6.5%) of wax
A 60 page beginner book, such as the Candle Science Candlemaking Handbook by Amy Crouch, fills in the theory behind those 7 items; most first-timers skip it and instead Find a Candle Making Class at a local craft centre, where a 2-hour session covers the same pour with a teacher at the table. If you want to make the work last a whole season, candle making for beginners kit boxes in the 15 to 30 pound range ship with 1 lb of wax, 4 jars, and 6 wicks, enough for 4 candles at a cost of about 50 p per candle, well under shop prices.
The materials that turn a kit into a practice
Beyond the kit, 5 inexpensive upgrades keep a home practice running smoothly. Buy them once and use them for every candle you pour after the first:
- Add a wick holder, 2 balsa strips or a pencil laid across the jar, which keeps the tab centred while wax cools
- Add a heat-safe stirrer, a 12 in wooden spoon
- Add a 3 in ruler, because wick trim to 1/4 in (6 mm) before burning is a repeatable, measurable habit
- Add a digital scale, which reads the pour weight to the nearest gram
- Add a 500 ml jug for measuring oil to 1 oz (30 ml) at the 6.5% dose
With the scale, you verify that each 10 oz jar actually holds its 8 oz of wax; with the ruler, every candle leaves the bench ready to light. Both checks take under 1 minute per jar, and both are the difference between a candle that performs and one that needs a second pour.
Safety before the wax melts
Safety requirements for a home candle making session are 3 rules about heat, wick, and fire. Wax melts at 135 F but pours at 130 to 145 F, so the double boiler does the job without an open flame on the wax itself. A dedicated 2 burner hob, with the saucepan on one and a cold sink within reach, covers the first rule. Wick safety is the second rule: the tab must sit on the sticker before any pour, and the trimmed 1/4 in length after cooling keeps the flame inside the glass wall. Fire safety is the third: a lit candle gets 1 hour of burn time at a stretch, never 2 hours, stays 3 in from curtains, and goes out before a napper leaves the room. Follow those 3 rules and the hazard list for this craft ends at a warm pitcher.
Pouring a jar candle, step by step
To pour your first jar candle, work through 6 steps in this order, and keep the thermometer in your other hand through all of them:
- Sticker the tab to the floor of the jar and centre the wick with the holder
- Melt 1 lb of soy wax in the double boiler, stirring until it reads 180 F
- Pull the pitcher off the heat and wait for 130 to 140 F
- Stir in 1 oz of fragrance oil at 130 F for 30 seconds, slow circles
- Pour 8 oz into each 10 oz jar, leaving 1 in of headspace to the rim
- Rest for 24 hours, then trim the wick to 1/4 in (6 mm) and cap the jar
A 10 oz jar takes about 2 minutes to fill, so a single 1 lb batch pours 2 candles at 4 oz each or fills 1 jar to its 8 oz target with wax to spare. The 24 hour cure is the part beginners rush; a candle that has cured shows a flat, even surface, while one poured and lit early shows the swirl marks that mark a rushed batch.
Why a homemade candle keeps going out
A homemade candle that keeps going out is almost always a wick problem, and 4 causes cover the large majority of failures:
- The wick is too small for the 3 in jar, so the flame starves of fuel and dips out
- The wick was trimmed to less than 1/4 in, shortening the flame below the jar rim
- The wax is still curing at 48 hours, so a soft pool swallows the flame
- A draught from a window or fan bends the flame sideways until it snuffs itself
Fix the wick first, because it is the 1 part you can change after the pour: swap a CD-8 for a CD-10 in a 3 in jar, retrim to 6 mm, and the same candle that guttered at minute 3 often burns its full 40 hours. If the pool stays soft after 48 hours, the wax was poured above 145 F and needs a slower second pour to rebuild a solid base.
Christmas and gifting, where the first candle goes
A beginner's first pour earns its place on the December table or inside a gift bag, and 3 uses cover most of the season. For a Christmas table, set the jar among 3 other candles at 6 in spacing and add dried sprigs of rosemary around the base; the 8 oz candle gives you 40 hours, enough for every evening from Advent to the 25th if it runs 1 hour a night. For a gift, pair 2 jars in a paper bag with a hand-written note and a 30 second lighting instruction card, and you have a present that costs about 6 to make and reads as far more. For a group, a 4 person pour session in a kitchen with 2 burners makes 8 candles in one afternoon, which is the social format this site leans on in the Balance Exercises for Elderly and craft circles, where the shared task gives the hour a shape. If you keep pouring through the holidays and find the output outgrows the gift box, look at Candle Making Profitability before you price a single jar for sale.
Start with 1 kit, 1 jar, and the 6 steps above; the second pour goes faster, the third goes better, and by the 4th candle the method is a habit rather than a lesson. That is the whole arc of candle making for beginners at home, from the 7 items in the box to the 40 hours it burns.